HOW TO: Fly automated missions with Waypoints 2.0 in DJI GO (The Complete Guide)
Overview
Use Waypoints 2.0 to create and automatically fly highly customizable waypoint missions in DJI GO with your Mavic 2 Pro or Mavic 2 Zoom. This intelligent flight mode allows you to:
- Create or edit missions while your drone is on the ground
- Create a mission that includes a set of points where the drone will automatically fly to
- Set the altitude, aircraft speed, aircraft direction, gimbal pitch, and camera direction for each waypoint
- Create points of interest (POIs) to make the camera point at an object or in a specific direction as it flies
- Take a photo, start recording video, or stop recording video when the drone reaches any waypoint
- Save and reload missions (so you can fly the same route later)
- Automatically fly the mission (even if the remote controller disconnects)
Here's a list of topics covered in this guide:
Waypoints 2.0 Prerequisites
You'll need to do the following before you'll be able to use Waypoints 2.0 in DJI GO:
- Install DJI GO 4.3.12 (or later)
- Install firmware version 1.00.03.00 (or later) on your Mavic 2 Pro or Mavic 2 Zoom
Create a New Waypoint Mission
Follow these steps to create a new mission in DJI GO:
1) Move the switch to the P position on the right side of the Mavic 2 remote controller.
2) Start DJI GO, connect your mobile device to the remote controller, and power on both the remote controller and the drone.
3) Tap the intelligent flight modes icon on left side of DJI GO.
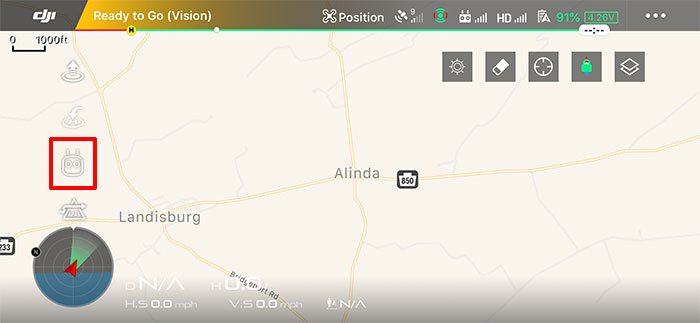
4) Tap the Waypoints icon.
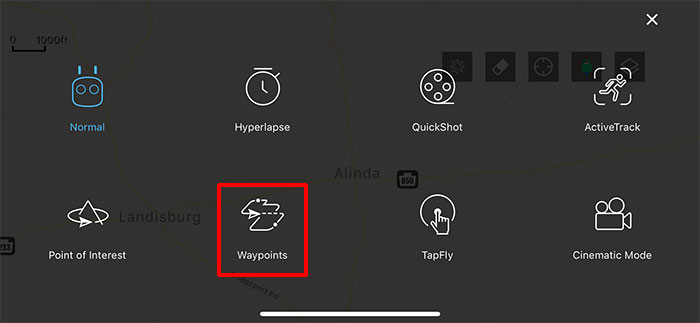
Note: At this point, you are now ready to begin creating your new mission. If you're using an Apple device, you can turn off the remote controller and drone in order to conserve the battery power while you work on your mission.
5) Scroll the map to the location where you'd like to fly your mission.
6) Follow these instructions to add waypoints to the map:
- Tap the waypoint icon in the top menu.
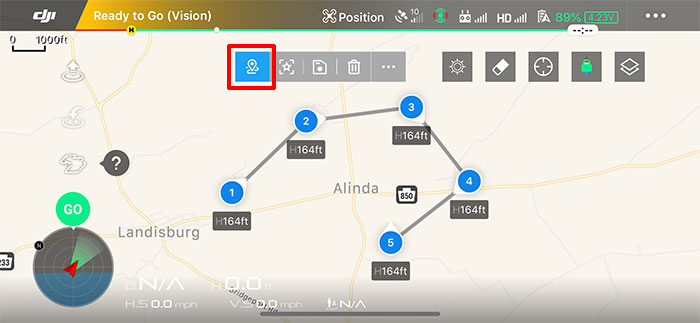
- Tap the map in each location where you'd like to add a waypoint. The waypoints will appear on the map as blue dots.
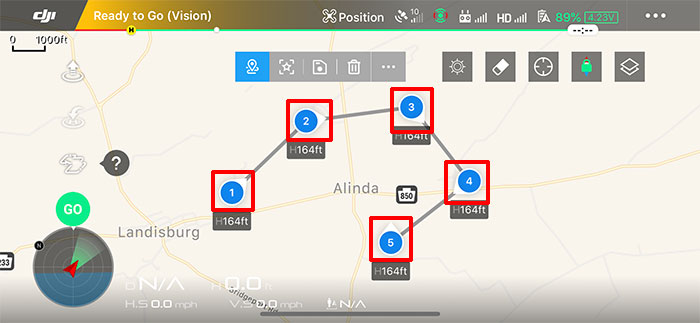
- To move a waypoint, tap and hold your finger on the waypoint for one second. You'll then be able to drag the waypoint to the desired location.
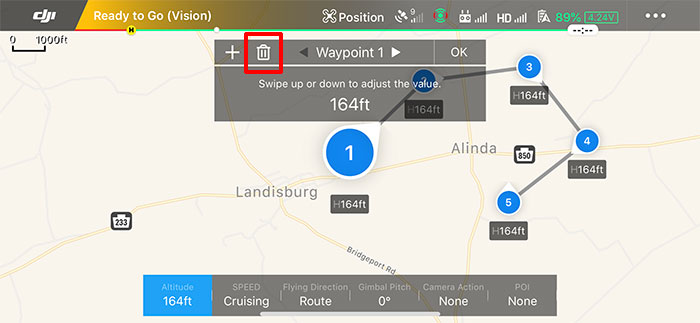
- To delete a waypoint, tap the waypoint and then tap the delete icon.
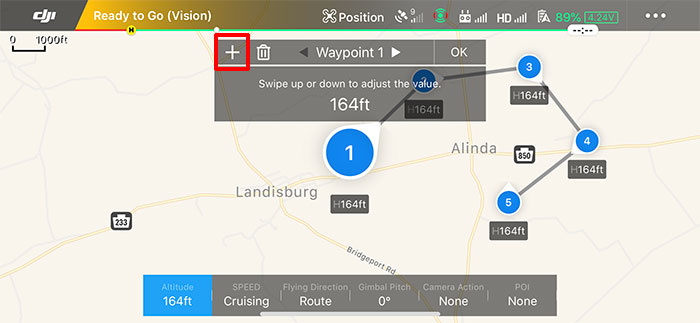
- To add a waypoint in the middle of two existing waypoints, tap the second waypoint and then tap the + icon.
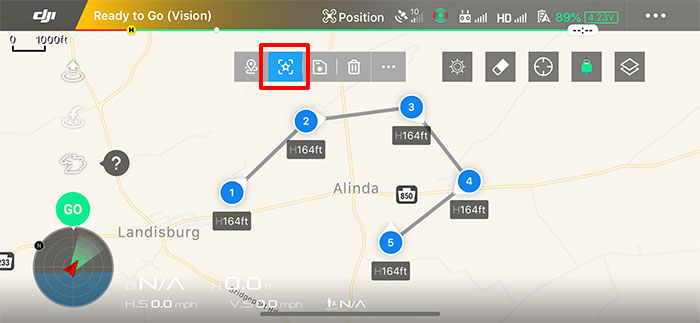
7) Points of interest (POIs) can be added to the map to make the camera point toward a specific location while it's flying the mission. This would be useful if you were (for example) flying around a house and wanted the camera to automatically point at the house at any point during the mission.
Follow these instructions to add POIs to the map:
- Tap the POI icon in the top menu.
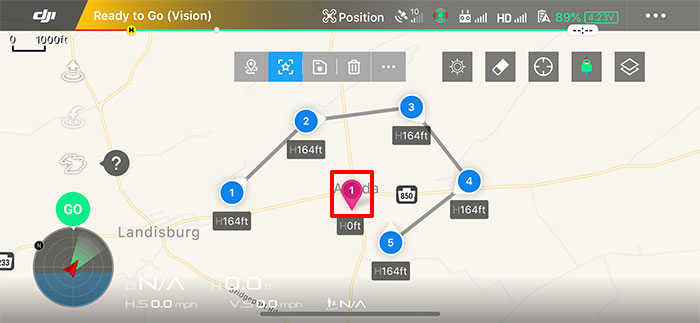
- Tap the map in each location where you'd like to add a POI. The POIs will appear on the map as pink dots.
- To move a POI, tap and hold your finger on the POI for one second. You'll then be able to drag the POI to the desired location.
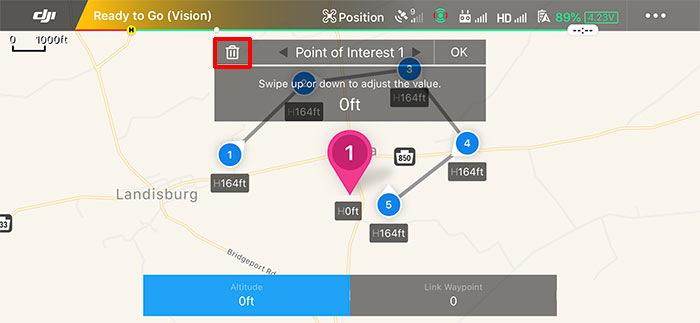
- To delete a POI, tap the POI and then tap the delete icon.
8) Tap a blue waypoint icon on the map to customize the settings for that specific waypoint. From the bottom menu, you can change the following:
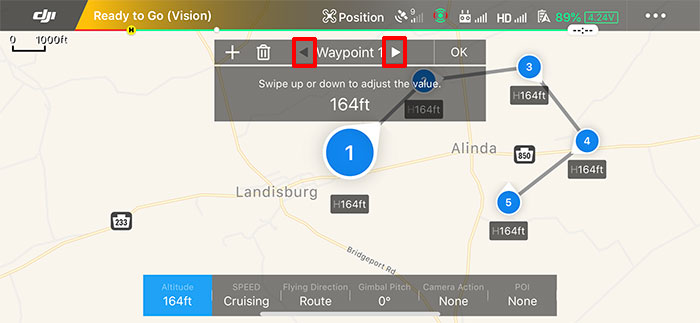
- Altitude: This is the altitude the drone will be at when it arrives at this waypoint. Swipe up or down on the screen to adjust the altitude. If the previous waypoint is set to a different altitude, the drone will gradually ascend (if the previous waypoint is lower) or descend (if the previous waypoint is higher) while it's flying to this waypoint.
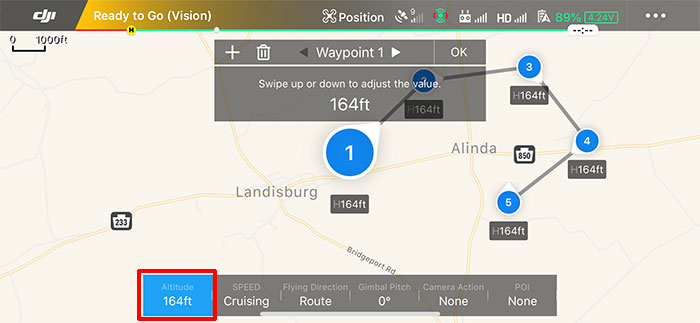
Note: If working on a mission while DJI GO is disconnected from the drone, the altitude can only be set to a maximum of 65 feet.
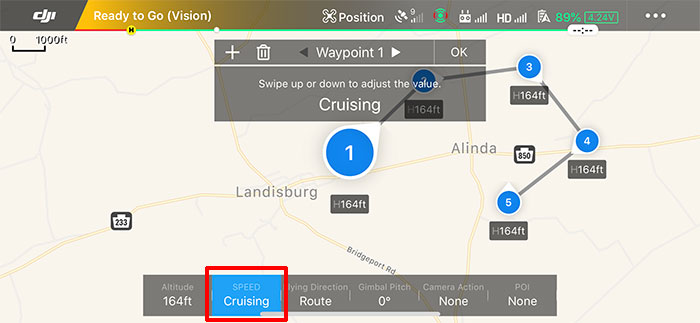
- Speed: By default, this setting will be set to Cruising and the drone will fly at the cruising speed that's set in the Route Settings. Swipe up or down on the screen to adjust the speed. The drone will be set to this speed when it reaches this waypoint.
- Flight Direction: By default, this setting will be set to Route and the drone will point in the direction it's traveling. If you'd like the drone to point in a different direction, tap Custom Direction and swipe up or down on the screen to adjust the flight direction (the aircraft heading). The white arrow on the outside of the blue POI circle shows the direction the drone will pointed when it arrives at this waypoint.
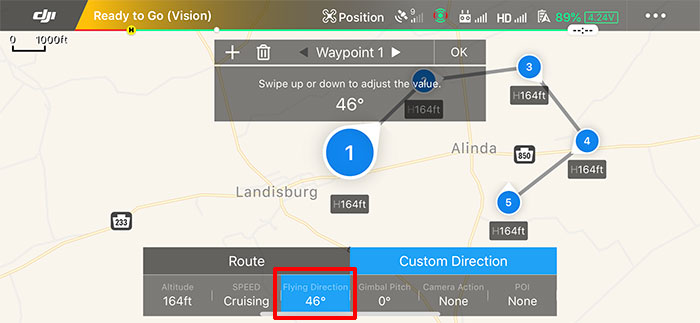
Note: If this waypoint is set to use a POI, this setting cannot be adjusted. The drone will automatically point toward the POI.
- Gimbal Pitch: By default, this setting will be set to 0° and the camera will point straight ahead. Swipe up or down on the screen to adjust the gimbal pitch.
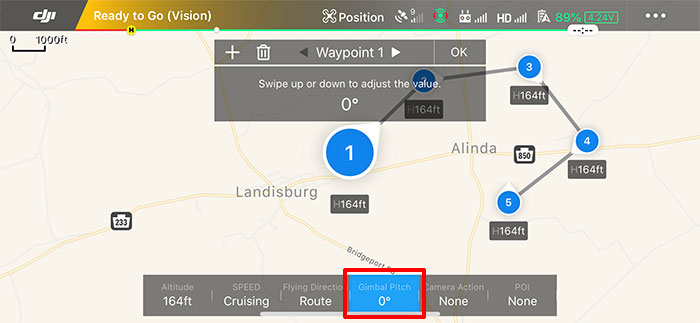
Note: If this waypoint is set to use a POI, this setting cannot be adjusted. The gimbal pitch will be automatically set to point the camera toward the POI.
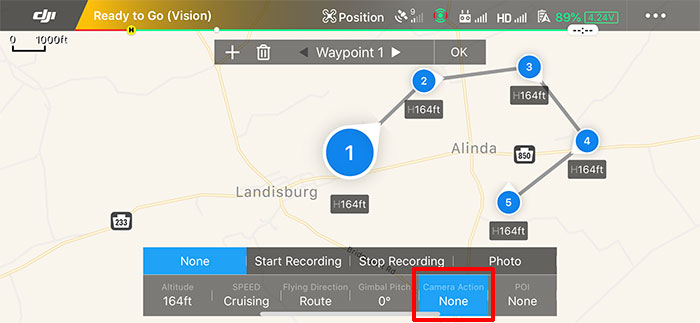
- Camera Action: By default, this setting will be set to None. You can also choose one of the alternative settings:
- Start Recording (start recording video after arriving at the waypoint)
- Stop Recording (stop recording video after arriving at the waypoint)
- Photo (take a single photo after arriving at the waypoint)
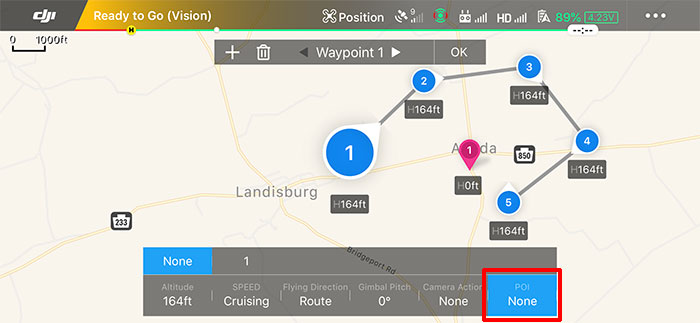
- POI: Select the point of interest (if you've added any POIs) on the map where you'd like the camera to point as the drone is flying toward and away from this waypoint.
Use the arrows to view the settings for the next/previous waypoint.
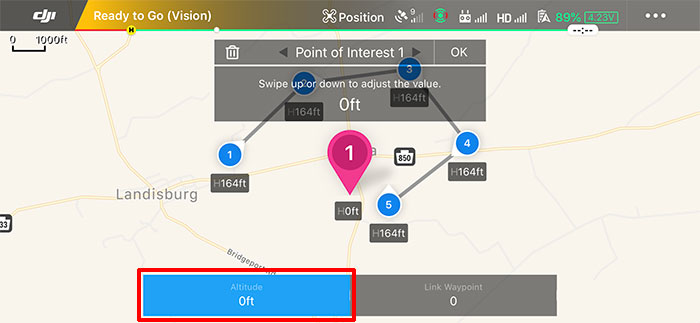
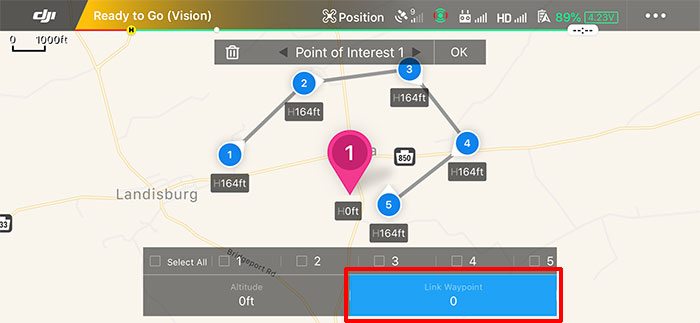
9) Tap a pink POI icon on the map to customize the settings for a specific POI. From the bottom menu, you can change the following:
- Altitude: By default, the altitude is set to 0 feet. This will direct the camera to point at the ground when focused on this POI. If you want to point the camera at the top of a building (for example), then set the altitude to the height of the building.
- Link Waypoint: Use this setting to choose which waypoints will be linked to this POI. This POI setting can also be set while changing the settings for each indivdual waypoint (as described above).
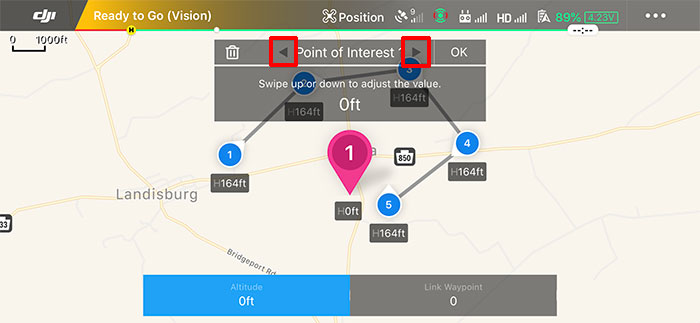
If you have additional POIs to edit, use the arrows to view the settings for the next/previous POI.
10) Open the Route Settings from the top menu.
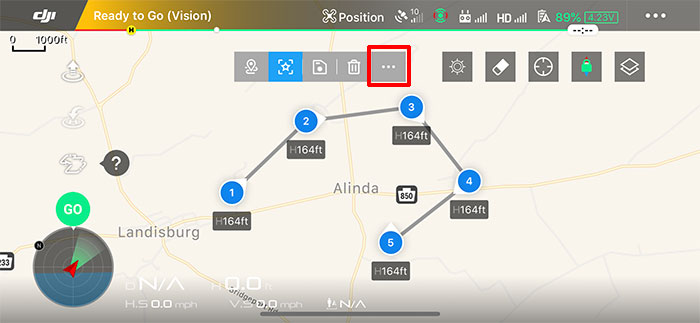
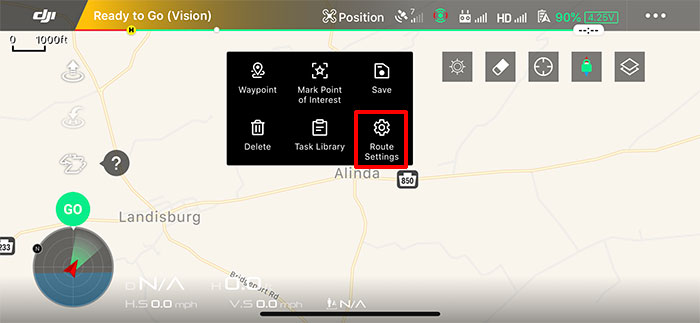
11) The following settings can be applied in the Route Settings:
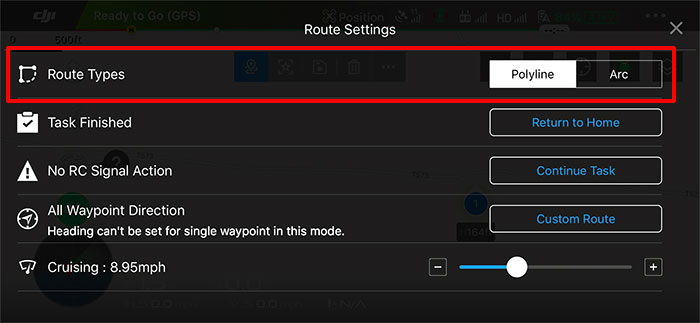
- Route Types: Select Polyline to make the drone fly a straight line from waypoint to waypoint. Or select Arc to make the drone fly in a smooth arc as it arrives and leaves each waypoint.
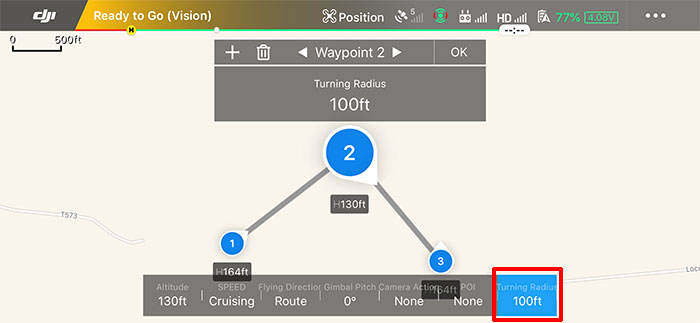
After selecting Arc, you'll be able to adjust the Turning Radius when editing waypoints. Swipe up or down on the screen to adjust the radius.
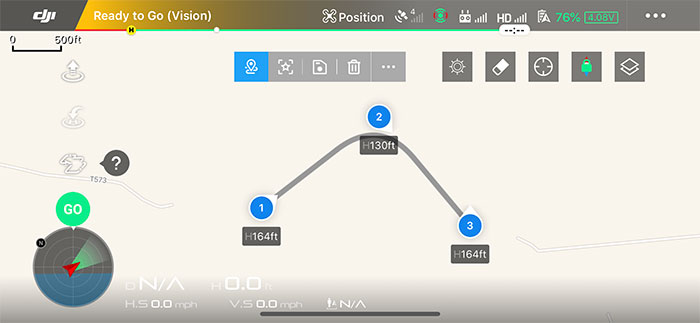
After adjusting the Turning Radius for a waypoint, the flight path on the map will change to show the new curved path that the drone will fly around that waypoint.
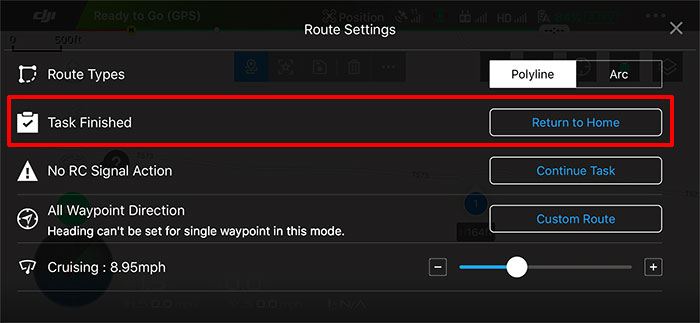
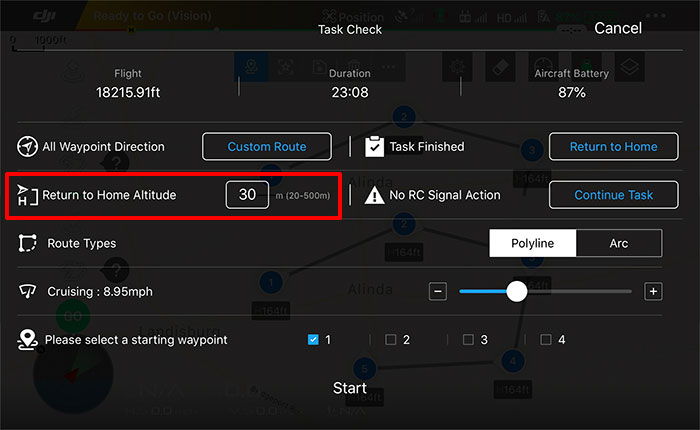
- Task Finished: By default, this setting will be set to Return to Home and the drone will return to the home point and land when it finishes flying the mission. You can also choose one of the alternative settings:
- Hover (hover in place and wait for your command)
- Return to First Waypoint (fly back to the first waypoint and wait for your command)
- Landing (land after it arrives at the last waypoint)
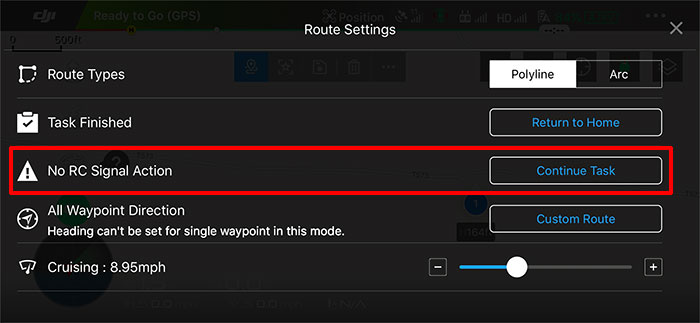
- No RC Signal Action: By default, this setting will be set to Continue Task and the drone will continue the mission if the remote controller signal disconnects mid-mission. You can also choose one of the alternative settings:
- Return to Home (abort the mission and fly directly back to the home point)
- Hover (hover in place and wait for your command)
- Landing (land at the location where the remote controller disconnects)
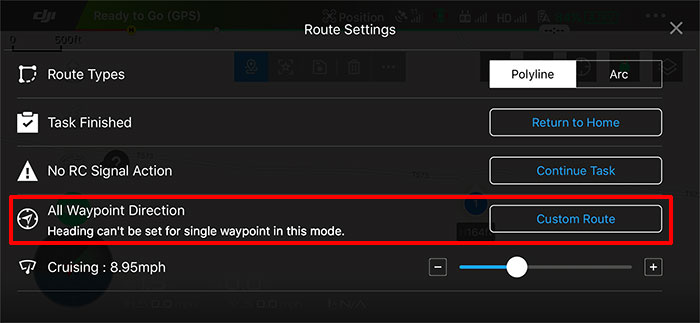
- All Waypoint Direction: By default, this setting will be set to Custom Route and the drone will point in the direction of the white arrow that surrounds each waypoint on the map. You can also choose one of the alternative settings:
- Free (this will allow you to manually yaw (turn) the drone while it's flying the mission)
- Route (this will make the drone point in the direction it's flying)
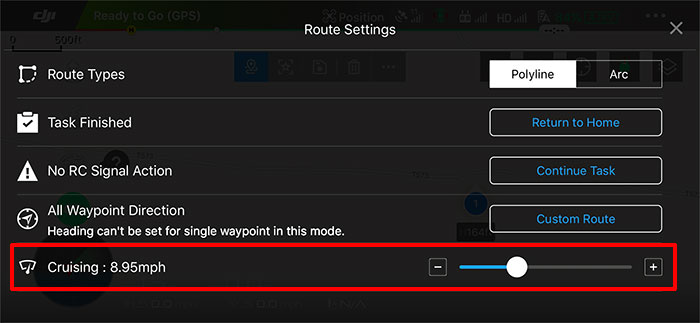
- Cruising Speed: The drone will fly at this speed for the entire mission. If you set a custom speed for any of the waypoints, that custom speed will be used for those specific waypoints instead.
12) Tap the save icon in top menu.
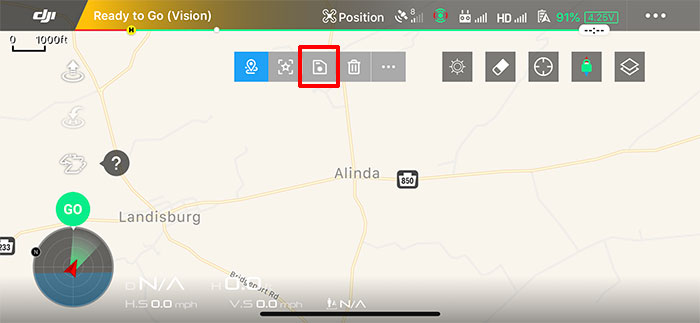
The mission will be saved with a name containing the current date and time. You can change the name in the Task Library. If you're planning on running this mission again at a later time, changing the name to something memorable will make it easier to find later.
To rename the mission:
- Open the Task Library from the top menu.

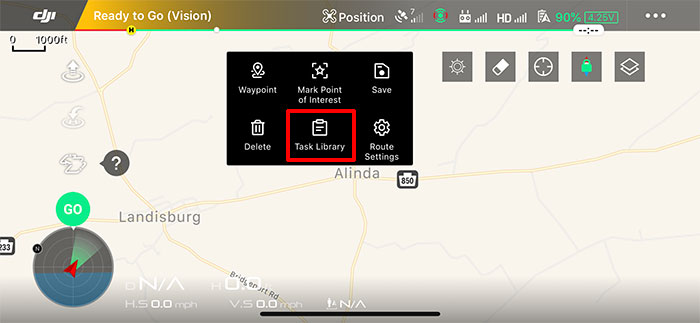
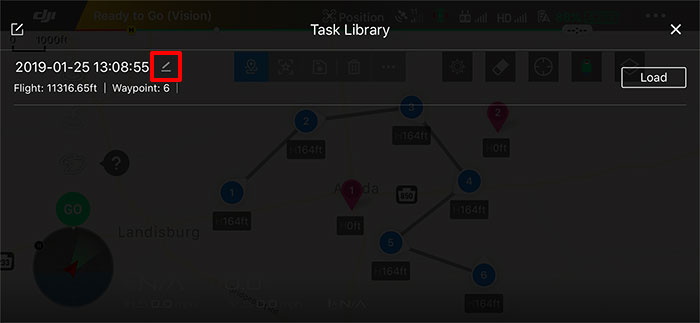
- Tap the edit icon for the mission you'd like to rename and the onscreen keyboard will appear.
Start Flying a Waypoint Mission
Follow these steps to start flying a mission in DJI GO:
1) Load the mission from the Task Library. See the Load an Existing Waypoint Mission instructions below.
2) Tap the green GO button on left side of DJI GO.
3) Review the settings in the Task Check list to ensure everything it set to your liking.
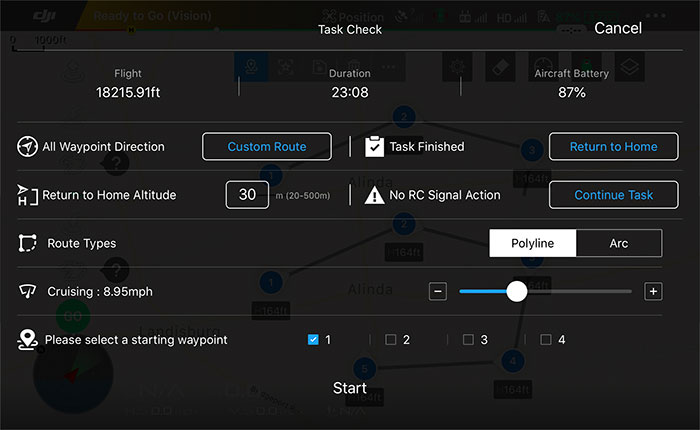
4) Scroll down to the bottom of the Task Check screen and tap Start to begin the mission.
Note: If your drone is in air when you start the mission, it'll immediately fly to the first waypoint. If it's sitting on the ground, DJI GO will prompt you to drag the auto takeoff slider to the right to auto takeoff and fly to the first waypoint.
As the drone is flying the mission, you can:
- Watch the drone on the map in DJI GO to see its current location (as long as the remote controller remains connected).
- Press the pause button on the left side of DJI GO or on the remote controller to make the drone stop and hover in place mid-mission. Press pause again to allow the drone to resume the mission.
- Press the red X button on the left side of DJI GO to cancel the mission and make the drone stop and hover in place (waiting for your command).
- Move the right stick (the elevator) down to make the drone reverse and fly back toward the previous waypoint.
- Move the right stick (the elevator) up to make the drone speed up and fly faster toward the next waypoint.
Load an Existing Waypoint Mission
Follow these steps to load an existing mission:
1) Move the switch to the P position on the right side of the remote controller.
2) Start DJI GO, connect your mobile device to the remote controller, and power on both the remote controller and the drone.
3) Tap the intelligent flight modes icon on left side of DJI GO.

4) Tap the Waypoints icon.

5) Open the Task Library from the top menu.


6) Tap the Load button beside the mission you'd like to open.
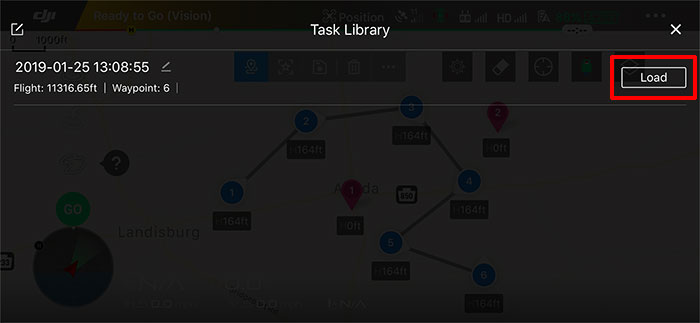
Delete an Existing Waypoint Mission
Follow these steps to delete an existing mission:
1) Move the switch to the P position on the right side of the remote controller.
2) Start DJI GO, connect your mobile device to the remote controller, and power on both the remote controller and the aircraft.
3) Tap the intelligent flight modes icon on left side of DJI GO.

4) Tap the Waypoints icon.

5) Open the Task Library from the top menu.


6) Tap the edit icon at the top, left corner of the Task Library.
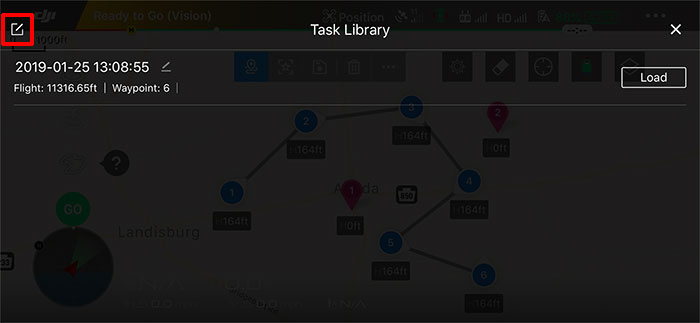
7) Tap the checkbox beside the missions you'd like to delete.
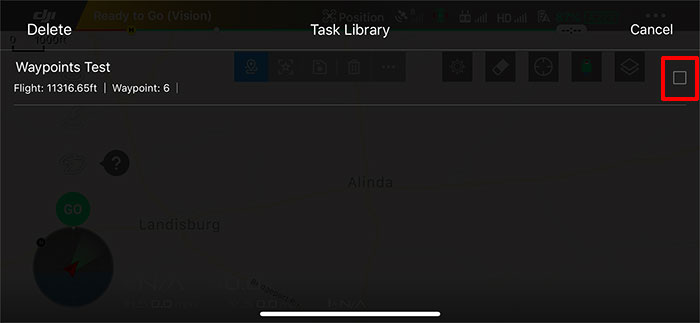
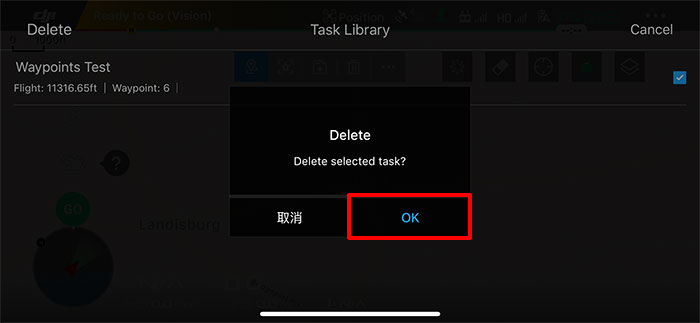
8) Tap Delete at the top, left of the Task Library.
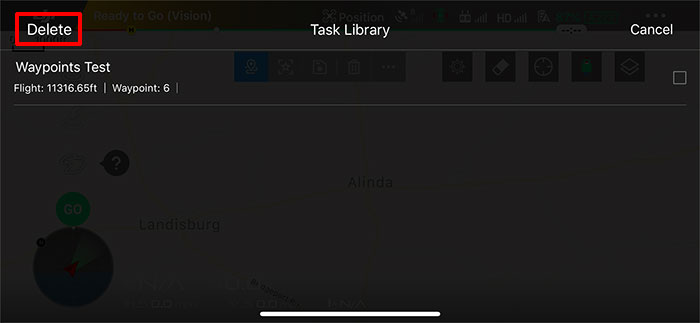
9) Tap OK to confirm that you'd like to permanently delete the selected missions.
Important Tips
Here are some important tips to keep in mind as you're setting up a mission:
1) If the drone is set to return home after the mission is complete or mid-mission if the remote controller disconnects, then you should check that the RTH altitude is set high enough to clear any obstacles in the flying area.
2) All altitudes shown in the mission planner are the altitude above the takeoff point (not the altitude above the ground below the waypoint/POI). If you're flying in a location where the terrain is not flat, you'll need to adjust the altitude at each waypoint accordingly to account for any altitude changes. You can use Google Earth to get an idea of how flat the terrain is in your flying location.
3) When the mission is started, the drone will ascend straight up to the altitude of the first waypoint before it starts flying to that waypoint.
4) If setting a different altitude between two waypoints, the drone will gradually ascend (if the next waypoint is higher) or descend (if the next waypoint is lower) while it's flying to the next waypoint. The drone will reach the altitude set for the next waypoint when it arrives at the next waypoint.
5) Make sure the path is completely clear between waypoints so the drone does not crash into an obstacle as it's flying from waypoint to waypoint.
6) The drone will use data from its onboard GPS receiver to locate each waypoint. Since GPS is not 100% accurate, it would be safest to make sure all waypoints are at least 50 feet away from any nearby obstacles.
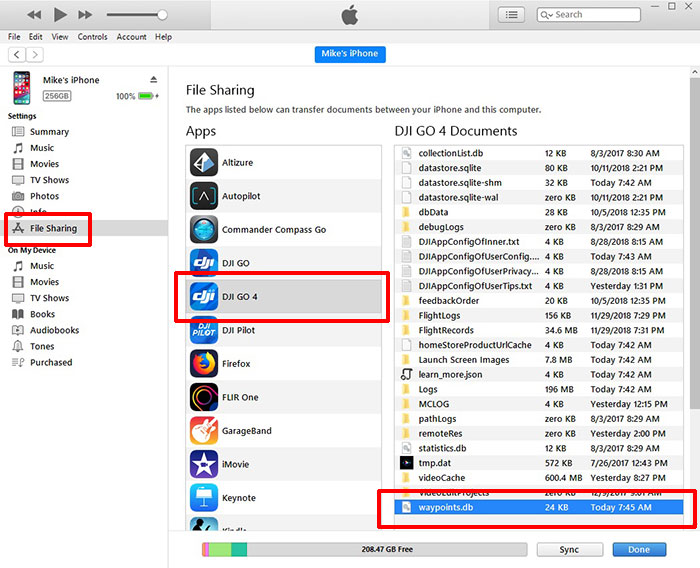
7) Saved missions are stored in a file named waypoints.db in the location where DJI GO is installed on your mobile device. You can manually back up that file if you have important missions that you don't want to risk losing.
8) If you have trouble adding the waypoints/POIs in the desired location on the map when tapping the mobile device screen with your finger or aren't able to easily tap the waypoint/POI icons to edit them, you can use a stylus (like this one) for more precise tapping.
9) You'll be able to set the waypoints more precisely if you add the waypoints while the drone is in the air (as shown in this video).
![]()
![]()


![]()
![]()


![]()
![]()


